It’s possible to use the HubSpot integration to trigger a survey invitation based onHubSpot activity.
This works with the existing SmartSurvey Address Book and Survey Invitations, so it’s worth familiarising yourself with those features beforehand, if you haven’t already.
Creating and sending the invitation
Before you start creating the trigger integration, you need to create an invitation email for the survey and send it manually at least once. This means you’ll need to create a contact list with at least once contact in it, create the email content, and send it to your test contact. This needs to be a “real” send, not a test, so that the invitation is moved from “draft” status to “sent”.
Once this is done, then you can set up the integration.
Setting up the Integration
To start, you will need to have created a connection between SmartSurvey and HubSpot using the integrations tool. For instructions on how to do this, see the section “Making the Connection” in the linked guide “Integrating a survey with Hubspot”.
Once this is set up, then you would select a connection on the integrations page and create a new integration.
Name the integration, and select “Trigger survey on event” from “Integration Type”.
Trigger Integrations Options
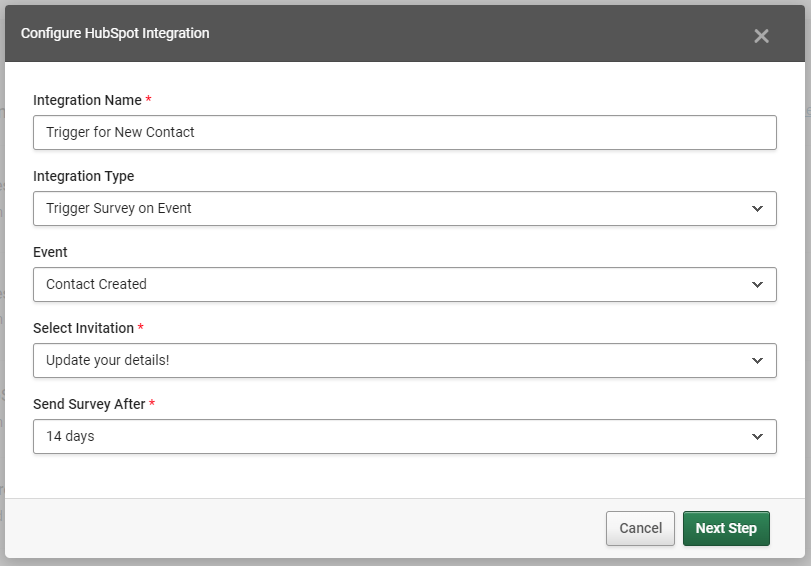
Event:
There is only one event available at the moment:
- Contact Created – a new record is created in the “Contacts” object of the linked HubSpot account.
It is possible for us to create new triggers as custom development. If your use case requires you to trigger a survey based on an object or criteria that's not listed above, contact your account manager.
Select Invitation:
Choose which of the “sent” invitations you want to send via this integration. If you have no invitations created and sent for this survey, you will see a red warning box under this and you won't be able to proceed.

Send Survey After:
This function allows you to build-in a delay after the action occurs before the invitation is sent. You can set a delay of a few minutes, or even up to 90 days.
After selecting all your options, click “next step”, and the integration will be created and set active.
Filtering
After creating the integration, you can set a filter on it. To set up a filter, select "filter" from the options drop-down, then select the fields you want to fiter on and the values you want to check for via the pop-up screen.
For more details on using filtering, see Filtering an Integration
Limitations
If you want to combine a trigger with a pull (to display record data in the survey content or use it as default answers), or an update (to amend data in the linked record) you will only be able to use one of the integrations that works based on email address. This is because this integration cannot pass across any custom column data as part of triggering the email. If this isn’t possible (most likely because you want to pull from an object that these pull types don't support) you’ll need to generate the email in HubSpot using a workflow and pass the recordID across using a Custom Variable in the URL.