SmartSurvey has a new integration with Salesforce to help you improve and streamline your data processes.
Making the Connection
To start, choose “Automate” after the Build stage, or from Home or My Surveys pages click on the icon.

The next thing you will be presented with is the list of available integrations.
To Connect to a Salesforce Org, simply click the “Configure” button next to the blue Salesforce Icon. To Connect to a Sandbox, look for the Grey Salesforce icon and do the same. If this is the first time you (as in, the SmartSurvey account you are using) has tried to connect to Salesforce, you will be prompted to make a connection and you’ll see the below box:
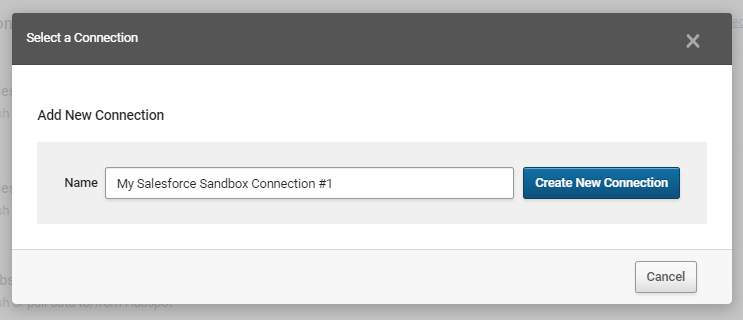
This gives you the opportunity to name the connection (useful if you need to connect to multiple Salesforce Orgs, for instance). Add your chosen name and click “Create new connection”
The System will now try and log in to the salesforce org or sandbox. If you are not already logged in in the same browser as is logged in to SmartSurvey, you should log in as you usually do. The connection should be made automatically, though you may need to pass a two-factor auth check depending on the Salesforce setup.
If you already have one or more Salesforce connections set up, then they will be listed above the "add new Connection" box and you just need to click the "Use" button next to the one you want to use.
Basic Configuration
The integration is easy to set up and you can perform the following Actions:
Push Actions
|
Pull Actions
|
Trigger on Event
|
| Create Record |
Get Record |
Lead Created |
| Update Record |
Get Contact By Email |
Contact Created |
| Update Contact by Email |
|
Case Closed |
| Upsert Contact by Email |
|
|
Name
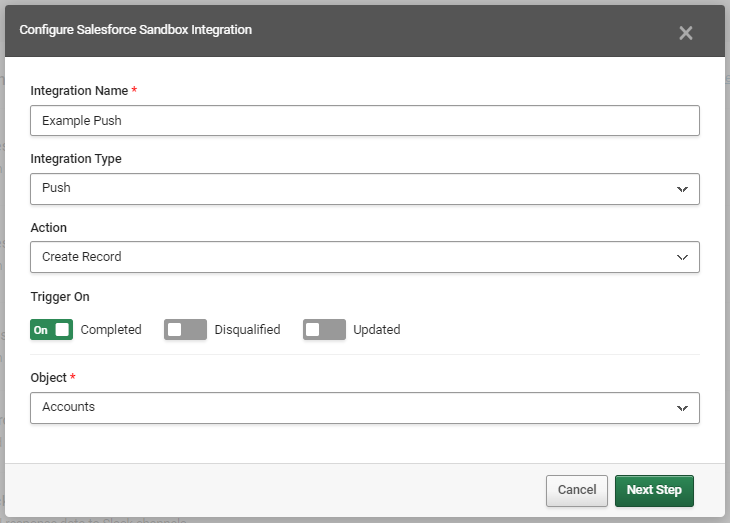
- Integration Name: Add a name for the integration.
Integration Type
- Push: Send Data from SmartSurvey to Salesforce.
- Pull: Retrieve data from Salesforce
- Trigger Survey on Event: Send an email invitation to this Survey, based on a salesforce event.
Push Actions
- Create Record: The integration will attempt to add a new record to the target object.
- Update Record: The integration will attempt to change the data in an existing record in the target object.
- Update Contact By Email: The integration will attempt to change the data in an existing record in the targeted Salesforce org's "Contacts" object, based on a supplied email address.
- Upsert Contact By Email: The integration will attempt to change the data in an existing record in the Salesforce org's "Contacts" object, based on a supplied email address. If a matching record is not found, a new record will be created.
Pull Actions
- Get Record: Access a record in the targeted object and read its data.
- Get Contact By Email: Access a record in the Salesforce org's "Contacts" object, based on a supplied email address.
Trigger on Event Actions
- Because Trigger Survey on Event integrations work significantly differently to pushes and pulls, they are documented in a seperate guide, "Triggering a Survey From Salesforce".
If Get Record or Update Record is selected, then an additional “RecordID” field will be loaded. This is required so that the integration knows, each time it atempts to transfer data, which record it is trying to access or change. As there are a couple of methods of going about this, and will touch on the Salesforce org's configuration, this is dealt with in the guide: Getting a Record ID into a Survey
Triggers
There are three options for triggering the integration:
- Completed: The Respondent completes the response in the usual way.
- Disqualified: The Respondent completes the response by triggering a Skip Logic rule to disqualify them.
- Updated: The respondent, or the survey editor, completes the response after accessing it via an edit link.
These can be selected or deselected in any combination. “Completed” will be set by default.
Objects
Unless either of the "...by Email" actions has been selected, you will also need to select an object for the integration to target by using the Drop-Down.
Record ID or Email

For "Update..." , "Upsert..." or "Get..." Integrations, you will need to tell the integration where to find the identifiying data for the record you want to target.
For integrations based solely on email, this section will be headed "Contact Email". For ones using IDs, it will be headed "<Object Name> ID"
You can do this by using the "Select Merge Code" drop-down, which will allow you to choose from survey data, variable data, and contact list data. For more details on passing this data into smartsurvey see Getting a RecordID into a Survey
Note for advanced SmartSurvey Users- the Merge Codes used by this function look similar to SmartSurvey Piping Codes, but they are not the same. Use the "Select merge code" and "insert" functions instead of copying a SmartSurvey Piping code from elsewhere.
Field Mapping (Push Actions Only)
The Field Mapping page will appear once you click "Next Step" on the main integration configuration page for a Push Action.
For a SalesForce Integration, the Field Mapping page displays all the mandatory fields in the targeted object down the left, with boxes to the right for your mapping settings for each field. You can add extra fields to map by clicking "Add Field" using the button below the list.

To map a field, click in its box to see the mapping options. There are two main options, Variables and Formulas

You can enter the name of the item you want to map whenever you see "Start typing to search..."
Variables
The Variables tab allows you to map specific variables directly to the object field.
- Questions: The answers to the questions on the survey
- Respondent Details: Various information about the specific respondent, such as response time, IP Address (if the survey is not anonymous), and selcted language.
- Survey Details: Details about the survey such as it's name or nickname.
- Custom Variables: Any Custom Variables associated with the survey
- Contact Info: Information from the Contact List.
Formulas
The Formulas Tab allows you to choose or create functions to modify variables before they are pushed to the object. The bulk of the list are ready-made functions that cover commonly-used transformations such as extracting first or last name, or getting the domain out of an email address, or combining strings. These actions can be stacked so a field can be mapped to a formula that uses as a variable that the output of a formula.
To map your survey, simply work your way through the listed fields and map them in turn. Your progress is saved at every point that you make a change, so there is no "Save Changes" button. Once you've mapped everything you want, then simply close the field mapping screen by clicking the X icon in the upper-right.
Pull Integrations
Pull integrations retrieve data from Salesforce to be be used as part of the survey, rather than sending data to Salesforce once the response is completed.
The retrieved data can then be used in Piping Tags as part fo the survey content or as default answers.
Finding the Data
So, to make this work, you need to first tell the integration what data it should retreive. this is done as part of the integration configuration described above, either you choose an object, and then enter an object ID into the survey data, or you use the "Get Contact by Email" and you only have to tell the integration where to find the email address. In both cases, the data to look for can be supplied as part of a survey question, as the pull integration will try and retrieve data every time it tries to display an "Integration" Piping tag.
Example - a survey could ask on the first page for a client's email address. It could then on the second page display details stored in that client's Contact record for confirmation.
Displaying the Data
To display the data as part of your survey, or as a default answer, you need to use a piping tag of the format:
[integration(field_name)]
Where "field_name" is replaced by the internal name of the property in the targeted Salesforce object.
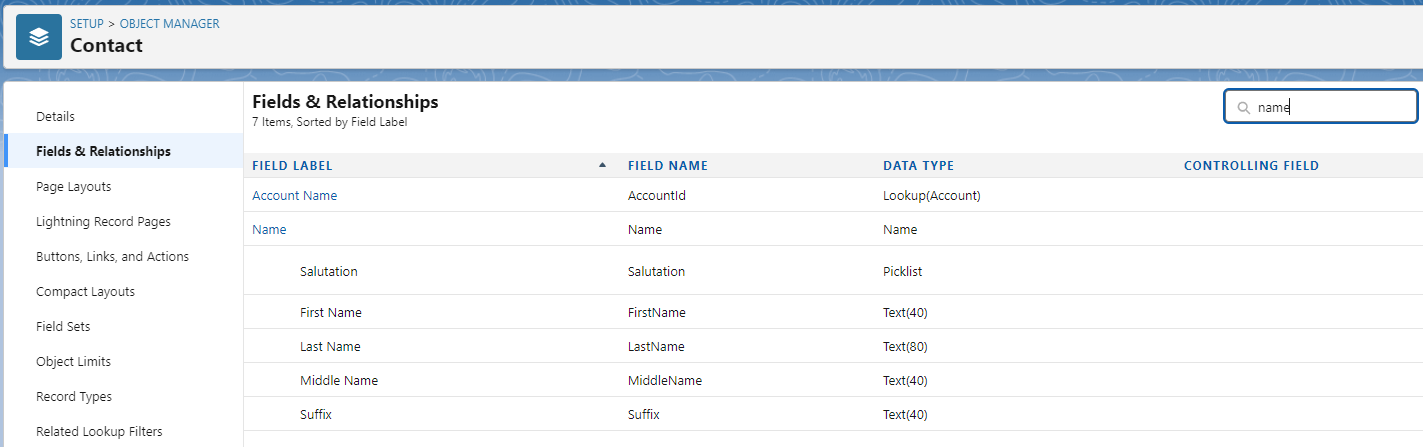
This is not the Label of the property (That being the friendly name, captialised and perhaps with spaces that you see in the Salesforce UI) but its internal name, which will be all lowercase, no spaces, and is what the property is known as to Salesforce's code and APIs.
- Go to your Salesforce Org's Setup.
- Click Object Manager.
- Locate and click the object you're targeting with the integration.
- In the sidebar, click Fields & Relationships.
- Locate the Field label (You can use the seach box to make this easier)
- See the 'Field Name' column name value for the API Name
So, to pipe "First Name" from the contact object into the survey via the pull integration, we need to add the tag: [integration(FirstName)]
You will need to add pull integration tags by typing manually as the piping tag UI that allows you to pick from a list of allowable tags does not have access to this information.