The feedback popup allows you to add a survey to a web page that will 'pop up' when visitors visit your website or appear on the right hand side of your website in the form of a button saying "Feedback".
Feedback Popup invitations focus on collecting short form survey responses, allowing your respondents to feedback directly within the popup, without opening a new window.
This encourages contextual feedback based on the users interaction with your website, making it quick and easy to share feedback, increasing response rates.
Survey Configuration
The feedback popup requires a specific survey format to be configured. If your survey does not meet the format below you will not be able to open the collector and it will remain closed.
To configured your survey to use a feedback popup, you'll need to ensure your survey only includes one of the following question types and an optional Comment/Essay box question.
- Star Rating
- NPS (Net Promoter® Score)
- CSAT (Customer Satisfaction Score)
- CES (Customer Effort Score)
You can enable comments on all of the question types above. The comments field will appear within the popup beneath the respondents answer to the question.
If you add a comment/essay box question, it will appear as a second step to the popup before the respondent submits.
Initial Setup
- Click Collect in the survey navigation
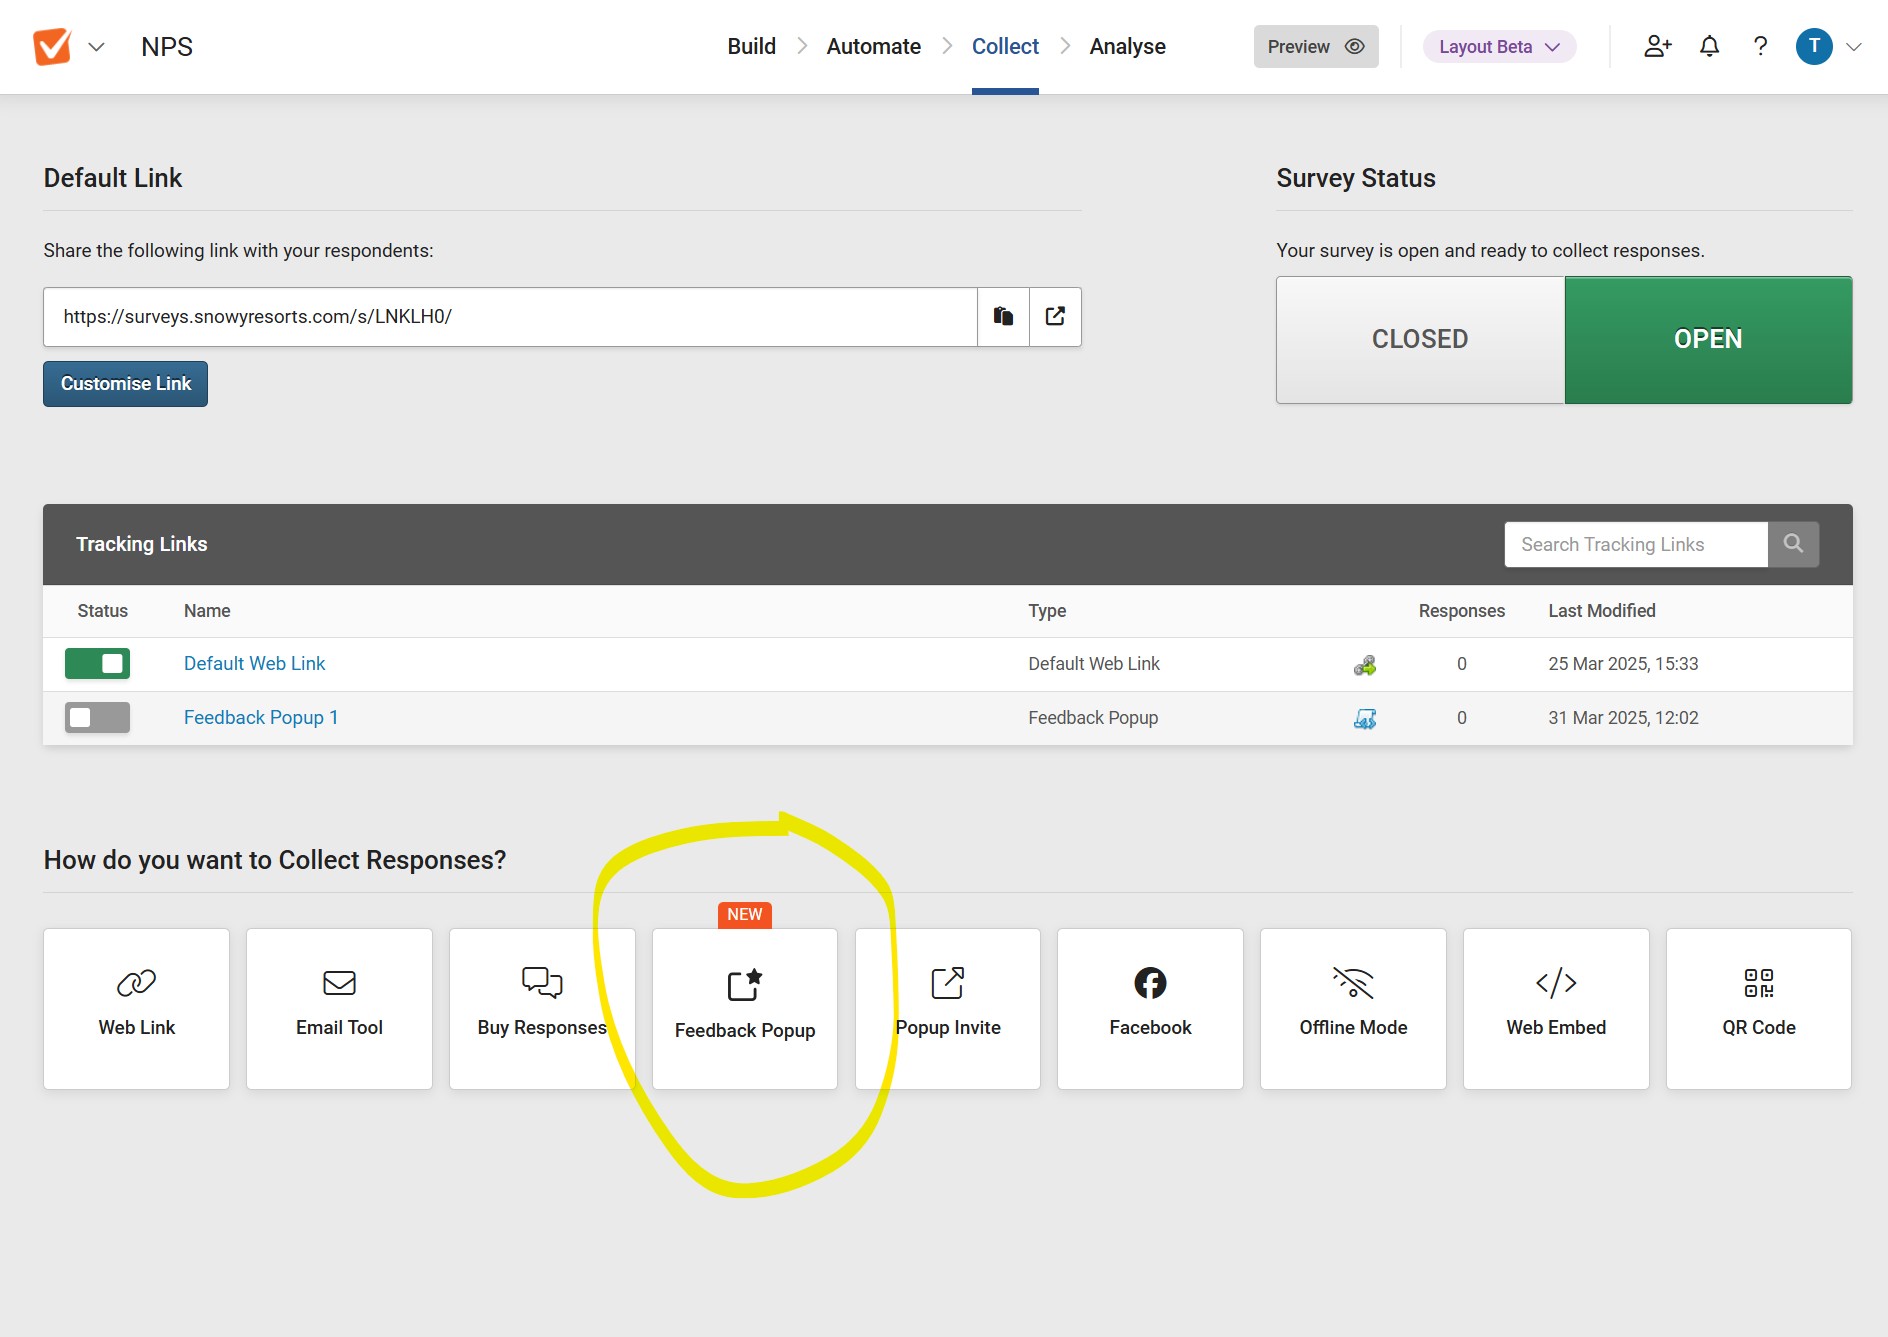
- Click on Feedback popup Invite at the bottom of the Collect page
- The page opens straight to the Install tab which shows you the code you'll need to add to your website. You can use this straight away and use the popup with all options set to default but for this guide, click Setup in the menu on the left

Popup Settings

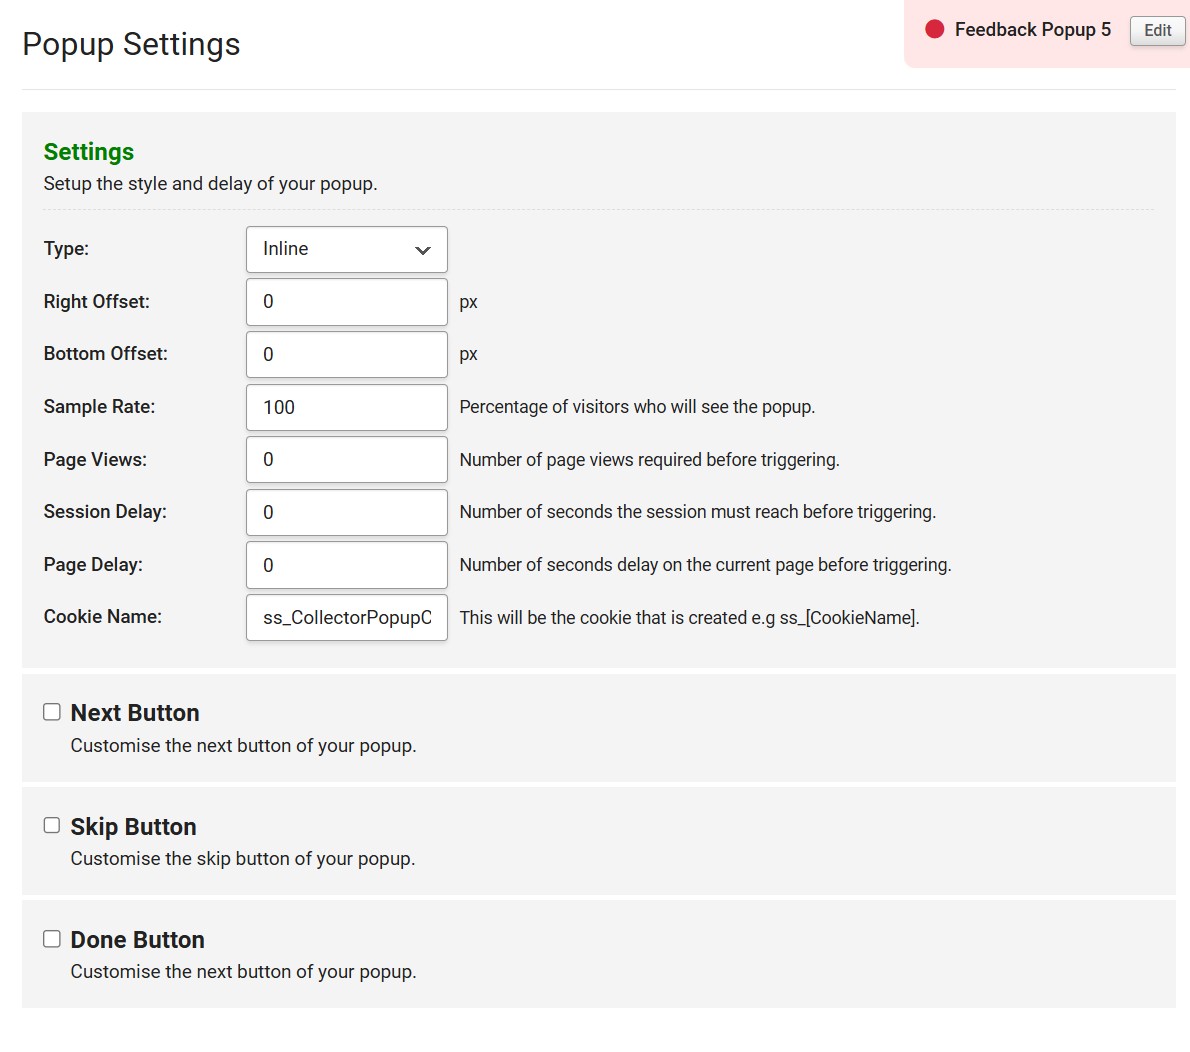
By default, the popup will appear for all visitors the moment they arrive on your website, however, there are a number of settings to control when, and how often, the popup will trigger:
- Type - Show the popup "Inline" based on the settings below, or add a "button" to the side of your website that is visible at all times
- Right offset - select how many pixels away from the right side of the browser you want the popup to appear
- Bottom offset - select how many pixels away from the bottom of your browser you want the popup to appear
- Sample rate – What proportion of site visitors will trigger the popup
- Page Views – Sets the number of times you require a visitor to view pages with the embedded popup code before the popup can trigger
- Session Delay – Sets the amount of time a visitor must have spent browsing pages on your site before the popup can trigger
- Page Delay – Sets the amount of time a visitor must have spent on a specific page before the popup can trigger
- Cookie Name - The name of the cookie that will be set. If you have multiple popups, we suggest giving each one an individual name
These options can all be used at the same time - for example, you can set the popup to trigger for 50% of users who have spent at least 10 minutes browsing the site and viewed at least 3 pages (bear in mind that the more restrictive the settings, the less data you'll get. You may need to experiment to find a "sweet spot").
Installing the popup on your website

Note: we suggest you speak with your IT department regarding installing code if they are responsible for managing the code on your website.
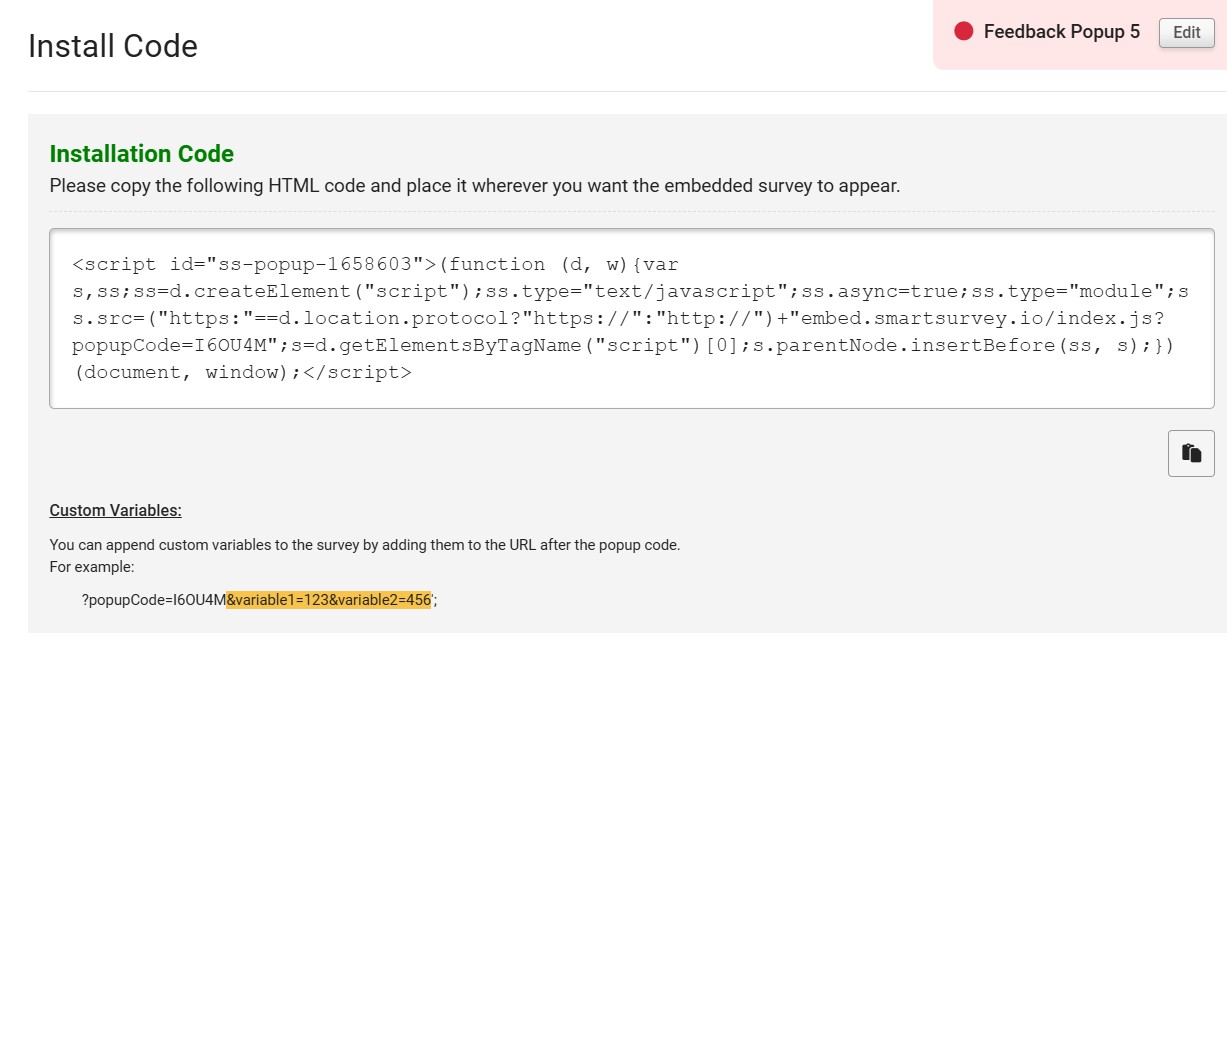
Clicking on the Save Changes button on the Popup Setup page will take you to the Install Code page; otherwise, select Install from the menu on the left of the Tracking Link Settings page. Copy the HTML code into your page (or pages).
Collecting data on your response
You can use custom variables to include respondent data when a response is submitted from your feedback popup. For example if you have users who have logged into your website or application, you can use custom variables to include information such as "user type", "contact email address" or "location".
See our helpguide for more information.
For the Link Settings help guide see Using Tracking Links.