Please Note - this is an advanced guide and requires that the user understands how to use all the following features: Custom Variables, how to add them to email tool invitations, and Default Answers. Implementing this technique will also require the user to create custom HTML for the invitation, so either to have web coding and design skills themselves, or access to someone who can create the required email HTML creative.
Adding a survey question directly into the email invitation can be done, if the user has access to Custom Variables.
The core of the technique is to have an email created that shows a question to the respondent, along with linked buttons to answer - each of these buttons is a link to access the survey, and has the answer option embedded in it.
Create the Custom Variable
From the white navigation bar to the left of the survey editor, choose Custom Variables and create a new variable to transfer the answer. Give it a name and a label and note the name. As an example, it might be "q1a" for "Question 1 answer".
Create the target question
If you haven't yet created the target question, do it now.
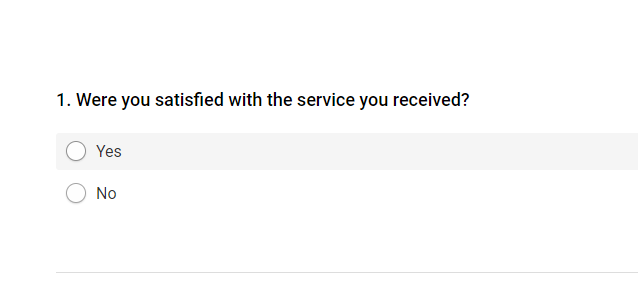
Example Question:

Apply the default answer
Open the Options for the question and toggle Default Answer. Click in the text field that appears and use the Insert Piping dialogue to choose your custom variable as the default answer. When selected it should appear in the default answer box. in our example, it wil say [variable(q1a)].
![The default answer box in the SmartSurvey Question editor, showing the value [variable(q1a)]](https://s3.eu-west-2.amazonaws.com/aws.smartsurvey.io/guides/260_defans.PNG)
Create the Email HTML
We cannot give extensive guidance on the creation of the email HTML as this will be done externally to SmartSurvey.
However, the following should be communicated to whoever is making the email:
Each possible answer to the question needs to have its own link to the survey.
If the survey is being sent via the SmartSurvey email tool, SmartSurvey will need to merge respondent-specific links into the email content. This is usually done with the [SURVEYLINK] tag, but this won't work in conjunction with the custom variable. The href tags need to use [SURVEYLINK_NL] so, wherever they are placed, the code should be like this: [SURVEYLINK_NL]&variablename=variablevalue.
So in our example, we would have both of: [SURVEYLINK_NL]&q1a=Yes and [SURVEYLINK_NL]&q1a=No
If the email is not being sent via the SmartSurvey email tool, then any live tracking link can be used.
So again for the example it would be:
https://www.smartsurvey.co.uk/s/V0N5QE/?q1a=Yes and https://www.smartsurvey.co.uk/s/V0N5QE/?q1a=No
(if you click the above links, you'll see that the example survey loads with the selected option).
Place the links in your created email however you wish. You can directly replicate the layout of the question as it would be in the survey, or do something else.
If your survey has a lot of options, or options which would be longer text strings, you can use optn (where n is the number of the option in the editor) instead of the answer text directly.
Last Step - Test thoroughly
Any application like this needs testing to ensure that it works properly. Especially on questions with a lot of options, its important to check every link in the email to make sure that it loads the correct answer on the survey.
Optional Extra Step - Hide the question
If you want to prevent the respondent from changing their mind, you can type "hidden" into the CSS Class box in Options. This will keep the question functional but not visible to the respondent although note that the question is still rendered and could theoretically be changed by the user by editing the survey HTML directly.
NOTE: Do not click the hide question box. This will functionally remove the question from the survey for respondents.