Enterprise Plus users can access a feature which allows them to create shared view links with their own chosen branding. Doing this gives you the advantage of real-time data collection and reporting while also maintaining your branding for anyone looking at the report via the generated link.
The Branding options allow you to set a logo and colour themes for the report header.
Shared Link Branding Options
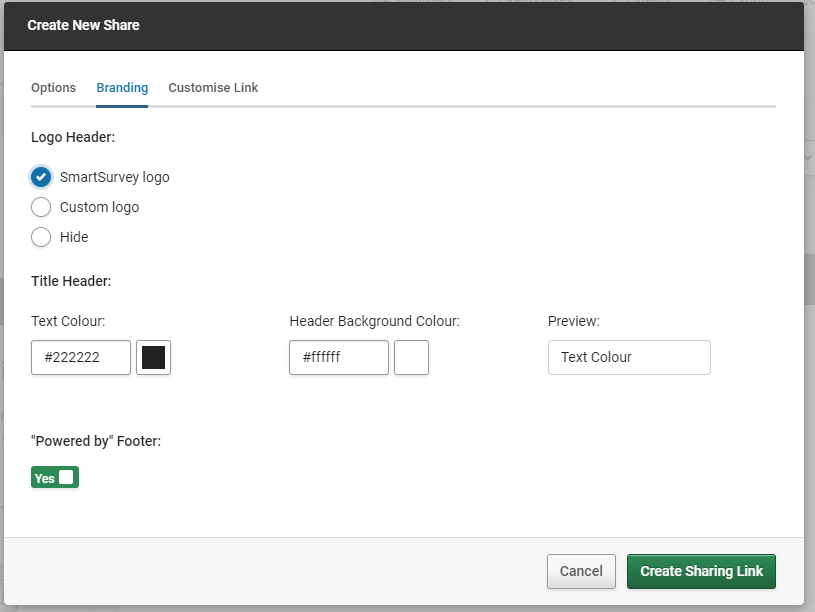
The shared link branding options allow you to set the following:
Logo Header
- SmartSurvey Logo: Use the standard SmartSurvey logo
- Custom Logo: Upload your own logo to use for the report, or choose a file that’s already in the File Library
- Hide: No Logo will display on the report:
Title Header:
Set the colours for the title header on the report. The text that this will brand is the title set on the Options tab. You can either directly enter these colours as hex RGB codes or use a colour picker. If your organisation has branding guidelines set out, you should be able to get the hex codes to use from your web design or marketing department. A preview of the chosen values is to the right of the colour options. A legibility check is automatically done to make sure that the combination of colours chosen has enough of a contrast between them so the text will be readable.
“Powered by” Footer:
Choose whether or not to include the “Powered by SmartSurvey” message in the footer of the page.
Customise Link Options
The "Customise Link" Tab has the following options for your sharing link:
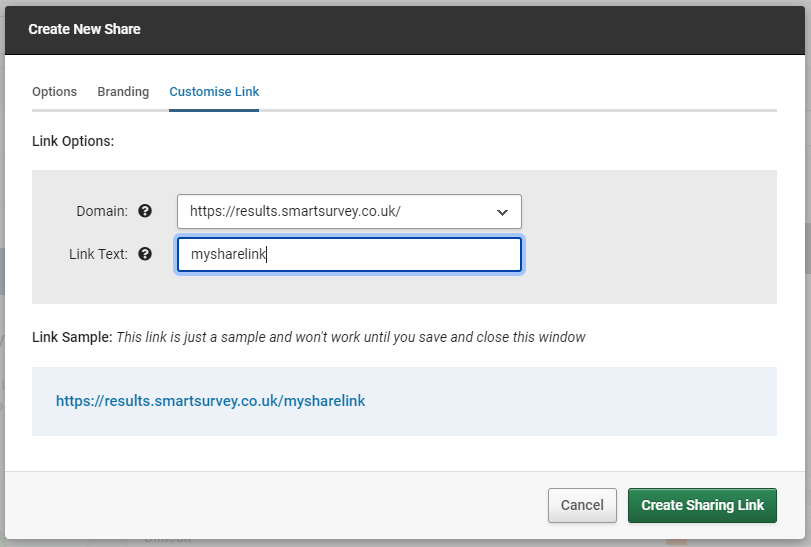
- Domain: Set whether the sharing link will use a smartsurvey domain or a custom domain (if one is set up on the account)
- Link text: Set your own text for the part of the sharing link after the domain.
Below this, the final link is displayed.
Creating a branded sharing link
- Set up your view as you want it, using the view and charts options.
- Save the View
- Create a share and set the standard options as usual
- Click the Branding tab to set your branding.
- Customise the link URL using the Customise Link tab.
- Click “Create Sharing Link”.