Azure Active Directory is Microsoft's enterprise cloud-based identity provider and enables SSO access to Microsoft Office 365. It can sync with on-premise Active Directory and provide authentication to other cloud based systems.
Azure Active Directory supports OpenID Connect, which is the SSO protocol that SmartSurvey uses for its SSO functionality.
Pre-requisites
This article outlines how to set up SSO with Azure Active Directory and assumes you have the access and the ability to set up new enterprise applications within your Microsoft account.
Single-Sign-On for SmartSurvey is available as an option on Enterprise accounts.
Add a new enterprise application
In Azure Active Directory admin center, go to Enterprise Applications > All Applications and click on "New Application" and then "Create your own application".

Choose "Register an application you're working on to integrate with Azure AD" and click next.
You can now name your application and add a Redirect URI. You can find the URI on your SSO Set up page within SmartSurvey:
Setting up your registered application
To set up your registered application go to Azure Active Directory > App Registrations.

On the overview page you'll find your Client ID, which you'll need to add to the first field "Client ID" on the SSO set up page in SmartSurvey.

On the overview page you'll also find a list of Endpoints. SmartSurvey SSO uses OpenID Connect, so you'll need to add the following URL to the "Discovery Origin" field on the SSO Set up page in SmartSurvey.
You must use the URL in this list, as it's specific to your app. It should end with /v2.0/ to ensure it's valid.

Next you'll need to generate a client secret and add it to the "Secret" field on the SSO Set up page in SmartSurvey. The application needs a client secret to prove it's identity when requesting tokens from Azure Active Directory.

Make sure you copy the Value and paste it into the "Secret" field. Once the page has refreshed, the secret value will be masked and you'll be unable to copy it. You'll then need to generate a new secret to be able to copy it again.
Map Azure AD data to returned claims
By default, the data needed for SmartSurvey to login is not returned from Azure Active Directory and these claims need to be manually mapped using a rule.
To do this go to your API Permissions and choose Microsoft Graph:

Then choose Delegated Permissions and select the following permissions via the search bar:

Your SSO Set up page in SmartSurvey
You should now have the 3 pieces of information required to set up your SSO with Azure Active Directory.
- Client ID
- Secret
- Discovery origin
You can add a warning threshold that determines when SmartSurvey sends a notification that you're reaching your user limit and a support message to ensure your sub users know who to contact with any questions regarding their SSO login. This support message will be shown as part of any error messaging within the SSO login journey.
Once you've saved your changes, SSO will be enabled and you will see a Login URL. This Login URL is to be used for logging in via your SSO configuration and can be shared with sub-users or added to your intranet for example. Whilst SSO is enabled, you will not be able to log in via the usual log in page.

Adding your users to your SmartSurvey app
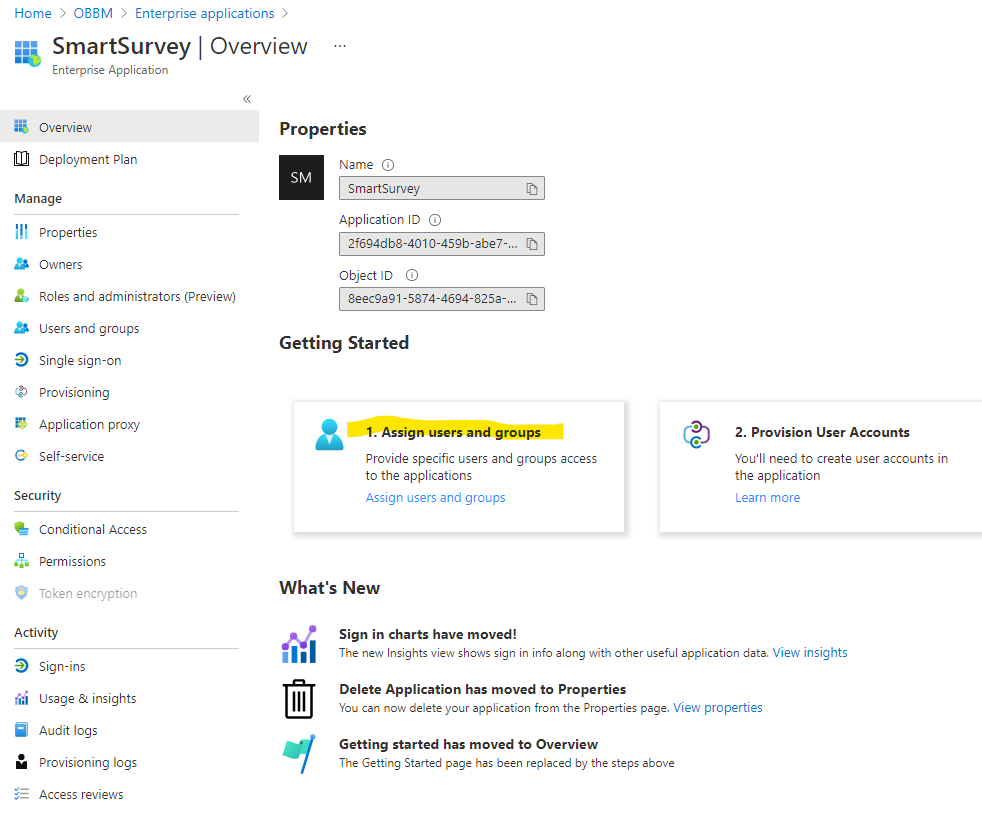
Next you'll need to ensure you've given access to your users. Otherwise, they will not be able to authenticate and login to SmartSurvey.
To do this, go to Enterprise Applications from the Azure Active Directory overview page.
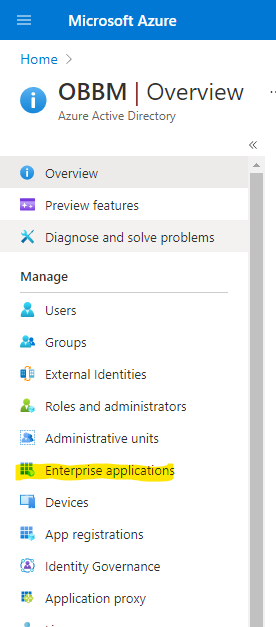
Choose your SmartSurvey enterprise application from the list. You can now "assign users and groups" from your main user directory.
New User Login
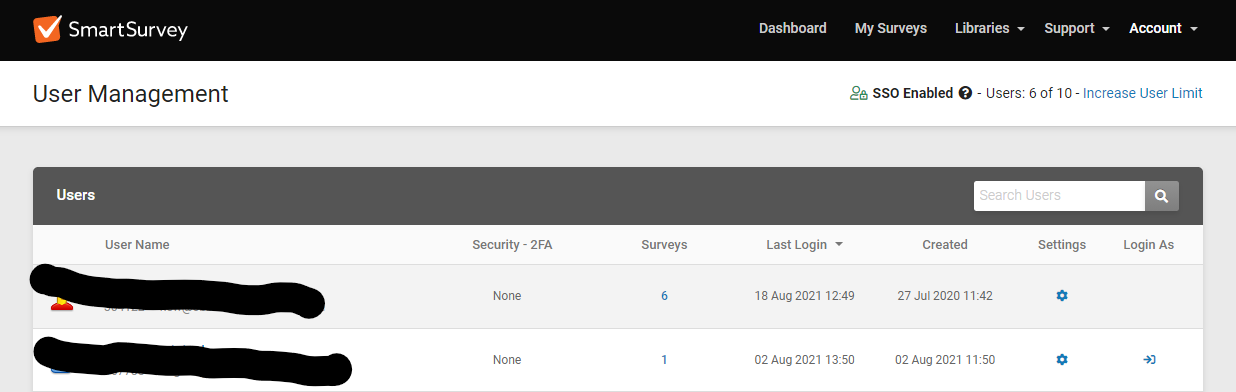
New users can login directly via your SSO login URL. They do not need to be added manually within SmartSurvey before signing in for the first time, they will automatically be created on first login, as long as your user limit allows.
On first log in, you will see the new user appear in your user list on the user management page within SmartSurvey, along with an overview of your user limit and indicator that your SSO switched on.